0

Your Cart is Empty

Tent Pitching Instructions

The instructions below are for current generation Mont tents. These descriptions will still be largely relevant for most previous generation Mont tents.

Mont Tents are sold fully seam sealed, waterproof and ready for rain. There is no need to seam seal your tent before use, though it is always wise to carry a tube of seam glue for emergencies.

Tent Model

Moondance Tent Pitching Instructions: Moondance 1, 2, 2N, EX, EXFN

Colours displayed here may not match the colour of your new tent.

  1. Locate a reasonably level area that will drain well during rain. Ensure that the area is free of sharp objects that could damage the tent floor. Ensure the camp site is safe; not subject to falling branches or rock etc. If you have a footprint, lay it on the ground shiny side up.
    Unfold the inner and spread it out fully with the tent floor face down. Peg out the corners of the inner, this is very important, especially when it is windy.
  2. Assemble the main DAC poleset. Avoid letting the poles snap together as this can damage the pole ends.
  1. Insert the pole ends into the eyelets in each corner of the inner. Poles are not colour coded and can engage on either end of the tent.
  2. On the tent inner are a number of hooks. Attach the hooks to their nearest pole section.
  3. Position the ridgepole across the top of the tent inner and over the top of the main pole. Above each door on the tent inner are clear plastic eyelets, attach each of these to the ends of the ridgepole.
  1. Place the fly over the inner. Above each door in the fly are black D-rings with finger loops. Use the finger loops to pull the D-rings over the balljoint at each end of the ridgepole.
  2. There are a number of hook-and-loop fastener straps on the inside of the fly, these should be secured around the tent poles for a stable pitch, this is especially important if you intend to stake out the guy lines in windy conditions.
  3. Engage the side-release buckles on each corner of the fly and inner. Adjust and tighten the fly in place being careful not to over tighten it. Peg out the vestibule/s, and other points on the fly as needed.
  1. In wet and/or windy conditions you should peg out the midpoint of the fly at each end, this will prevent water running off the fly onto the inner.
  2. In windy conditions peg out the 3-point-attachment guy cords. These guy cords are multi-directional and self-adjusting.

3-Point-Attachment Guy Cord Instructions

On Mont Moondance Tents you will find 3-point attachment guy cords at either end. These guy cords are fitted in such a way as to prevent tangling while not in use.

To utilise these guy cords correctly follow these simple instructions.

  1. At the top of the guy cord arrangement you will notice a metal ring over a plastic toggle. Unhook this metal ring from the toggle.
  2. Follow this unhooked cord to the base of the fly, you will find it threads through a loop of fabric. Unthread the cord from the fabric loop.
  3. Extend the guy cord, secure with a peg and tension with the grey cord tensioner.

Note: The metal ring from step 1 is only for holding the guy cord up while not in use. Do not use the metal ring while pegging out the guy cord.


Krypton pitching instructions

View instructions

Dragonfly pitching instructions

Photos coming soon.

  1. Locate a reasonably level area that will drain well during rain. Ensure that the area is free of sharp objects that could damage the tent floor. Ensure the area is not subject to falling branches or rock etc. If you have a footprint, lay it on the ground, shiny side up.
  2. Unfold the inner and spread it out with the floor face down. Peg out the corners of the inner, this is very important, especially if it is windy.
  3. The Dragonfly tent has three poles: two long and one short (the ridgepole). Assemble the poles, being careful not to let sections snap together hard as this can damage pole ends.
  4. One of the longer poles has transparent clips approximately one-quarter and three-quarters the way along its length. Take this longer pole and insert each end into the eyelets along one long-side of the inner.
  5. Repeat step four with the other long pole along the opposite long-side of the inner. These two long sections will cross over twice.
  6. On these two poles you will see the transparent clips on one and black rings on the other (The black rings are fixed between the 3rd and 4th pole section from each end). Align the black rings on one pole with transparent clips on the other and push the pole into the transparent clips to secure the poles together. There is a black latch on the transparent clip, close this over the pole.
  7. On the tent inner are a number of yellow hooks. Attach these hooks to their nearest pole section.
  8. Assemble and position the ridgepole across the top of the tent inner and over the top of the two long poles. Above each door on the tent inner are transparent eyelets, attach each of these to the ends of the ridgepole. It is important that the ridgepole sits atop the other two poles.
  9. Attach the remaining yellow clip at the centre of the tent inner onto the ridgepole.
  10. Place the fly over the inner. Above each door in the fly are black D-rings with finger loops. Use the finger loops to pull the D-rings over the ends of the ridgepole and transparent eyelets.
  11. There are six hook-and-loop fastener straps on the inside of the fly, these should be secured around the tent poles for a stable pitch, this is especially important if you intend to stake out the guy lines in windy conditions.
  12. Engage the side-release buckles on each corner of the fly and inner. Adjust and tighten the fly in place being careful not to over tighten it. Peg out the vestibule/s, and other points on the fly as needed.
  13. In wet or windy weather, you should peg out the midpoint of the fly at each end, this will prevent water running off the fly onto the inner.
  14. In windy weather, you should peg out the 3-point-attachment guy cords. These guy cords are multi-directional and self-adjusting.
  15. The Dragonfly is fitted with additional guy cord attachment points above each door. These should only be employed in high side-on wind conditions. These guy points should not be used in heavy snow loading conditions. When employed, these guy points draw down the top of the tent making it flatter across the top; desirable in high winds. A flatter roof reduces the Dragonfly's ability to shed snow; undesirable in heavy snow and no wind.
Mont Dragonfly Tent on the NSW Snowy Mountains. By Nick Hall.

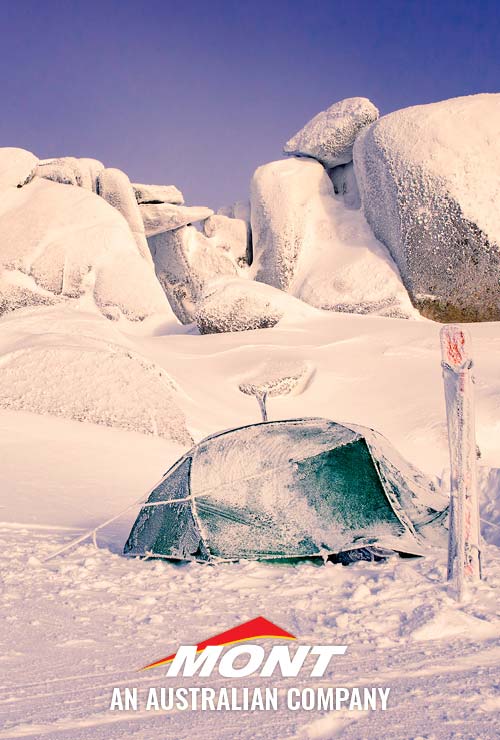
The Mont Dragonfly Tent on the NSW Snowy Mountains 2020. By Mont staff member Nick Hall.

3-Point-Attachment Guy Cord Instructions

On the Mont Dragonfly Tent you will find 3-point attachment guy cords at either end. These guy cords are fitted in such a way as to prevent tangling while not in use.

To utilise these guy cords correctly follow these simple instructions.

  1. At the top of the guy cord arrangement you will notice a metal ring over a plastic toggle. Unhook this metal ring from the toggle.
  2. Follow this unhooked cord to the base of the fly, you will find it threads through a loop of fabric. Unthread the cord from the fabric loop.
  3. Extend the guy cord, secure with a peg and tension with the grey cord tensioner.

Note: The metal ring mentioned in step 1 is only for holding the guy cord up while not in use. Do not use the metal ring while pegging out the guy cord.


Epoch Tent Pitching Instructions

  1. Locate a reasonably level area that will drain well during rain. Ensure that the area is free of sharp objects that could damage the tent floor. Ensure the camp site is safe; not subject to falling branches or rock etc.
    Unfold the inner and spread it out fully with the tent floor face down. Peg out the corners of the inner, this is very important, especially when it is windy. Pegging out the inner will also make step 2 much easier.
  2. Assemble the 2 yellow poles. Avoid letting the poles snap together as this can damage the pole ends.
    Push, do not pull, these poles through each of the sleeves that run diagonally across the inner from corner to corner. Insert the pole ends into the eyelets at each corner.
  1. Assemble the two orange cross poles. Push, do not pull, the poles through the pole sleeves above each door, making sure to thread them under the other poles.
  2. Insert the pole ends into the eyelets on either side of the inner, as shown in picture 4.
  1. Clip the clear hooks to the orange poles. If using single poles, clip both to the same pole as pictured. If using double poles, clip one to each pole.
    The Epoch tent has the capacity for double poles to withstand extreme blizzard conditions.
  2. Check that all pole hooks and pole ends are secured. The Epoch inner is now assembled.
  1. Throw the fly over the top of the assembled inner. If you cannot see the orange guy cords on the outside, the fly is upside down. The Epoch inner is symmetrical and the fly can face either direction.
  2. There are a number of hook-and-loop fastener straps on the inside of the fly that attach to the poles. Secure these around the poles for a stable pitch, this is especially important if you intend to stake out the guy cords in windy conditions.
  1. At the small-vestibule end of the fly, attach the eyelets to the pole ends in each corner, then attach the two middle eyelets on each side of the fly to their respective pole ends.
  2. Push the grey vestibule pole through the pole sleeve on the larger vestibule of the fly and insert the pole ends into the eyelets at the corner of the inner.
  3. Peg out the vestibules front and rear, and guy cords as needed. In wet and/or windy conditions you should peg out all guy cords.

Eddie 2 & 3 Tent Pitching Instructions

Colours displayed here may not match your tent colour.

  1. Locate a reasonably level area that will drain well during rain. Ensure that the area is free of sharp objects that could damage the tent floor. Ensure the camp site is safe; not subject to falling branches or rock etc.
    Unfold the inner and spread it out fully with the tent floor face down. Peg out the corners of the inner, this is very important, especially when it is windy. Pegging out the inner will make step 3 much easier.
  2. Assemble the 2 long DAC poles. Avoid letting the poles snap together as this can damage the pole ends.
  1. Push each long pole into and through the sleeves that start near each corner of the inner. These sleeves do not cross over. When both poles are through the sleeves insert the pole ends into the eyelets at the corners of the inner.
    Do not pull poles through the sleeves, only push.
  2. Assemble the short ridgepole. Slide the ridgepole through each of the two orange loops of webbing found across the centre of the inner.
  3. Insert the ridgepole ends into the eyelets at the top of each door. There are webbing loops at the eyelets to help you tension the inner when inserting the ridgepole ends.
  1. On the tent inner are 5 black hooks, 1 above each corner and 1 in the centre top. Attach these black hooks to their adjacent pole.
  2. Check that all pole sections are joined completely and that all pole hooks are secured.
  1. Throw the fly over the top of the assembled inner, if you cannot see the orange guy cords half way up from each corner the fly is upside down. The Eddie inner is symmetrical and the fly can face either direction.
  2. There are hook-and-loop fastener straps in each corner on the inside of the fly. Secure these around the poles for a stable pitch, this is especially important if you intend to stake out the guy cords in windy conditions.
  1. Attach the eyelets at each corner of the fly to the pole ends and tension the fly accordingly. Peg out the vestibules, and other points on the fly as needed.
  2. In wet and/or windy conditions you should peg out the midpoint of the fly at each end, this will prevent water running off the fly onto the inner.

Stargazer Tent Pitching Instructions

  1. Locate a reasonably level area that will drain well during rain. Ensure that the area is free of sharp objects that could damage the tent floor. Ensure the camp site is safe; not subject to falling branches or rock etc.
    If you have a footprint, lay it on the ground coated side up.
    Unfold the inner and spread it out fully with the tent floor face down. Peg out the corners of the inner, this is very important, especially when it is windy. Pegging out the inner will make step 3 much easier.
  2. Assemble the 2 long DAC poles. Avoid letting the poles snap together as this can damage the pole ends.
  1. Push each long pole into and through the sleeves that start near each corner of the inner. These sleeves do not cross over. When both poles are through the sleeves insert the pole ends into the eyelets at the corners of the inner.
    Do not pull poles through the sleeves, only push.
  2. Assemble the short ridgepole. Slide the ridgepole through each of the two orange loops of webbing found across the centre of the inner.
  3. Insert the ridgepole ends into the eyelets at the top of each door. There are webbing loops at the eyelets to help you tension the inner when inserting the ridgepole ends.
  1. On the tent inner are 5 black hooks, 1 above each corner and 1 in the centre top. Attach these black hooks to their adjacent pole.
  2. Check that all pole sections are joined completely and that all pole hooks are secured.
  1. Throw the fly over the top of the assembled inner, if you cannot see the orange guy cords half way up from each corner the fly is upside down. The Stargazer inner is symmetrical and the fly can face either direction.
  2. There are hook-and-loop fastener straps in each corner on the inside of the fly. Secure these around the poles for a stable pitch, this is especially important if you intend to stake out the guy cords in windy conditions.
  1. Attach the eyelets at each corner of the fly to the pole ends and tension the fly accordingly. Peg out the vestibules, and other points on the fly as needed.
  2. In wet and/or windy conditions you should peg out the midpoint of the fly at each end, this will prevent water running off the fly onto the inner.